Tuesday, June 21, 2011

Storable Fuel: Charcoal

Even if you don't have a grill, consider stocking up on charcoal.  Look for deals on charcoal, especially near the end of summer.  You CAN store this great fuel source long term, so STOCK UP.  Keep in mind not all charcoal brands may be equal.  I've heard Kingsford burns the longest.  Store charcoal in a moisture-protected container.  Humidity is bad for it.  Use tight-sealing buckets or drums.

From the Homeland Security website:

Charcoal is the least expensive fuel per BTU that the average family can store. Remember that it must always be used out of doors because of the vast amounts of poisonous carbon monoxide it produces. Charcoal will store for extended period of time if it is stored in air tight containers. It readily absorbs moisture from the surrounding air so do not store it in the paper bags it comes in for more than a few months or it may be difficult to light. Transfer it to airtight metal or plastic containers and it will keep almost forever.
Fifty or sixty dollars worth of charcoal will provide all the cooking fuel a family will need for an entire year if used sparingly. The best time to buy briquettes inexpensively is at the end of the summer. Broken or torn bags of briquettes are usually sold at a big discount. You will also want to store a small amount of charcoal lighter fluid (or kerosene). Newspapers will also provide an excellent ignition source for charcoal when used in a funnel type of lighting device.
To light charcoal using newspapers use two or three sheets, crumpled up, and a #10 tin can. Cut both ends out of the can. Punch holes every two inches around the lower edge of the can with a punch-type can opener (for opening juice cans). Set the can down so the punches holes are on the bottom. Place the crumpled newspaper in the bottom of the can and place the charcoal briquettes on top of the newspaper. Lift the can slightly and light the newspaper. Prop a small rock under the bottom edge of the can to create a a good draft. The briquettes will be ready to use in about 20-30 minutes. When the coals are ready remove the chimney and place them in your cooker. Never place burning charcoal directly on concrete or cement because the heat will crack it. A wheelbarrow or old metal garbage can lid makes an excellent container for this type of fire.
One of the nice things about charcoal is that you can regulate the heat you will receive from them. Each briquette will produce about 40 degrees of heat. If you are baking bread, for example, and need 400 degrees of heat for your oven, simply use ten briquettes.
To conserve heat and thereby get the maximum heat value from your charcoal you must learn to funnel the heat where you want it rather than letting it dissipate into the air around you. One excellent way to do this is to cook inside a cardboard oven. Take a cardboard box, about the size of an orange crate, and cover it with aluminum foil inside and out. Be sure that the shiny side is visible so that maximum reflectivity is achieved. Turn the box on its side so that the opening is no longer on the top but is on the side. Place some small bricks or other noncombustible material inside upon which you can rest a cookie sheet about two or three inches above the bottom of the box. Place ten burning charcoal briquettes between the bricks (if you need 400 degrees), place the support for your cooking vessels, and then place your bread pans or whatever else you are using on top of the cookie sheet. Prop a foil-covered cardboard lid over the open side, leaving a large crack for air to get in (charcoal needs a lot of air to burn) and bake your bread, cake, cookies, etc. just like you would in your regular oven. Your results will amaze you.
To make your own charcoal, select twigs, limbs, and branches of fruit, nut and other hardwood trees; black walnuts and peach or apricot pits may also be used. Cut wood into desired size, place in a large can which has a few holes punched in it, put a lid on the can and place the can in a hot fire. When the flames from the holes in the can turn yellow-red, remove the can from the fire and allow it to cool. Store the briquettes in a moisture-proof container. Burn charcoal only in a well-ventilated area.

Wednesday, May 11, 2011

Vacuum Sealing Mylar with Your Foodsaver

You want to protect food from air, moisture, and light.  Home vacuum sealers and their respective bags can protect against the elements.  I still prefer mylar bags for long term, however.  Mylar is thicker and more impenetrable than plastic vacuum seal bags, and protects from light.  It is tougher to tear too.  But for many dry food items, you need oxygen absorber packets in order to seal mylar for long term storage.  Unused and sealed O2 absorbers only last 6 months to a year or so, so they have to be continually purchased. Sometimes you'll notice the next day it didn't absorb all your air and you have to try again.  If only you could just get that instant satisfaction like with a vacuum sealer.  You can't seal a mylar bag in most regular (external) vacuum sealers because it lies too smoothly to allow air to suck out when it is against the heat strip.  Chamber vacs allow mylar to be vacuum sealed but are extremely expensive.  While researching options, I came across several videos on YouTube on this very subject.  Check out this possible alternative to sealing your mylar bags...


You won't be able to use cannery bags in some Foodsavers because the heat strip is too short in some models for the bag width.  In that case, however, you could cut the bag in half or just thinner and heat seal the cut edges to create a smaller bag, then proceed to vacuum the top.  Note: models that require the ends of the bag to be inserted into a slot for vacuuming and sealing may not work at all, you'd have to try and see.

Foodsavers are also good for resealing your mylar bags once they are opened.  For example, if you have a bag of oatmeal you plan to go through within the month, just heat seal it closed (forget vacuuming) so you can throw it back in the freezer(or wherever you store it) without it spilling out.  Another option is to open the contents of your mylar bags and pour them into empty #10 cans for convenient opening and closing.  

Another tip for sealing Mylar bags, whether with and O2 absorber or without, is to use a flat iron (for hair).  It easily seals if you slide the tool along the opening slowly but continuously; you just have to use a steady hand.  I’ve had great success with this method!

Tuesday, April 19, 2011

Peggy Layton Articles


Peggy Layton is an author of several food storage and preparedness books.  Here is some recommended reading!

Monday, April 18, 2011

Build an Outdoor Oven

This article is from last spring's Mother Earth News magazine.  This would be great for emergencies or anytime!  

Click on each page to view larger.  You should then be able to click on it to zoom in for reading or to print.


Page 1


Page 2
Page 3
Page 4

Or see this link.

Thursday, April 14, 2011

Whole Egg Powder Review


Eggs are an essential ingredient in baking and cooking.  They add texture and taste, as well as fantastic nutrition!  If you often use fresh eggs, you should consider powdered eggs in your emergency supply.  You can purchase Whole Egg Powder, Egg Whites Powder, or Egg Yolks Powder, but Whole Egg Powder is the way to go for general baking and cooking.  It does not need to be refrigerated, and stored 75 or below egg powder will last 5-10 years sealed and 6 months-1 year opened, depending on brand.  It is pasteurized and can be used in recipes in which you use raw eggs, which means you your kids can eat that cookie dough with a clear conscience.

How much does it cost and how much do you need?  Well, you have to pull out the ol' calculator.  Different brands list different serving sizes as equaling one egg, with different quantities of eggs claimed in each can.  This gets tricky because, for example, Augason Farms eggs say 56 eggs per can at $17.45, while Shelf Reliance state 236 eggs per can at $23.29.  I haven't inquired about their methods of processing, but even with adjusting serving sizes, weights, and volumes for a side-by-side comparison (which I totally did not do), according to that claim, Shelf Reliance would be by far the biggest bang for your buck.  However, in my observation, they are MOST OFTEN NOT the best value in terms of quantity--being one of the most expensive food storage brands--so to me that is all kind of a big WUH?  (Some guesses on an explanation can be read here.)  But how much you need will come down to approximately how many eggs you go through in a week x 52 and then check the can quantity, etc.  The brand I currently have is Provident Pantry from Emergency Essentials, which states that each #10 can is 2.25 pounds and equals about 80-90 fresh eggs.  When purchased at $14/can as they are priced currently with group orders, you are getting a dozen eggs at about $2.  Not bad considering the current price of eggs is about the same and you can't store them long term.  (Unless you try mineral oil!)

But how do they taste?   If you've never used egg powder, it may sound like some pretty kooky stuff.  Truth is, is does smell "interesting" and has a texture that reminds me of Moon Dough.  But it's not so mysterious.  In baking you simply add it to your dry ingredients (per the specified number of tablespoons listed on your brand of egg powder), and then add water (per the specified number of tablespoons listed on your brand) with your other wet ingredients.  In my experience there is no noticeable difference whatsoever when using egg powder vs. fresh eggs in baking.

In the place of fresh scrambled eggs, they do taste different.  I whipped some up tonight and here is how it went:


First I scooped a couple eggs-worth of powder into a sealable container (this is so I can shake the mixture, which is supposed to produce a better, fluffier mix than whisking).  This brand from Emergency Essentials requires 2 tbsp of powder to 3 tbsp water in order to equal one egg.


Here's that texture:


Below shows the aftermath of the measured water added and a good shaking given in a closed container.  It's somewhat thickish:


But mostly thinnish:


So here's what I concluded...

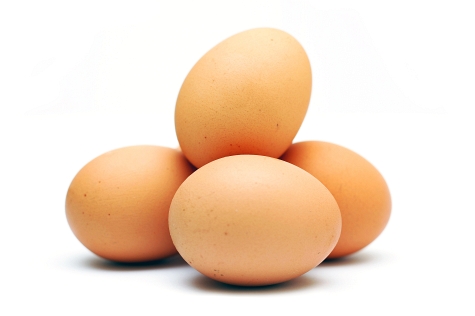
It's just not the same, but it's not the worst thing I've ever eaten.  I didn't like them, but I could see how someone could.  To be fair, I did nothing to season them so as not to mask the taste.  I'm thinking yes on the masking of the taste.  Surely there are things you can do to come out with a usable recipe.  Alone these had a bland batter-taste and didn't come out fluffy, but had a texture more like pancakes that are too thin and too eggy.  What I've done in the past is mix egg powder in with fresh eggs, which works much better.  Below is a visual of what we ended up with this evening.  Left to right:  Fresh eggs, Half-and-Half fresh and powdered, and Whole powdered eggs.  The more fresh mixed in, the more fluff and familiar the taste.  All-in-all, I will continue to primarily use powdered eggs in baking, but it's nice to know we have eggs to cook in times of need.


Summary:

According to online reviews of powdered eggs, there are those who like 'em, those who don't.  Some brands may be better than others as well.  My opinion on the EE eggs:

Baking, yes!  In place of fresh, meh.


Sunday, April 10, 2011

Medical References?

Thanks to another blog, I found these printable references: Where There Is No Doctor and Where There Is No Dentist. You can also purchase them on Amazon.com.  These are 2010 editions.  I cannot speak for the correctness of the information, but this is something you may want to look into for your emergency library!
Some of the basic topics of No Doctor include:
  • How to properly administer medicine and dosage instructions
  • The proper methods of injecting medicine
  • How to deliver a baby
  • How to heal without medicines
  • Guidelines for the use of antibiotics
  • Home cures
  • Medicinal plants
  • Homemade casts

Some of the basic topics of No Dentist include:
  • How to properly examine and diagnose dental issues
  • How to treat cavities, abscesses, infected sinuses, and more
  • How to prepare and insert homemade fillings
  • How to inject inside the mouth
  • How to safely and correctly remove a tooth


LDS Cannery Prices

Prices everywhere are rising.  Prices at Home Storage Centers have already risen twice this year.  Check out the current cannery prices here.  The cannery remains one of the most inexpensive suppliers for the staple items available there!  Stock up!